GTA Rebuild Underway....

A place to showcase your pride and joy

Moderators: eastlmark, BIG_MVS, Test Moderator

User avatar
User

coopercobra

Rank

Non Member

Posts

88

Joined

Sat Jun 04, 2011 9:50 pm

Location

Llandegla


Has thanked: 1 time
Been thanked: 1 time

GTA Rebuild Underway....

Postby coopercobra » Sun Jun 26, 2011 12:16 pm

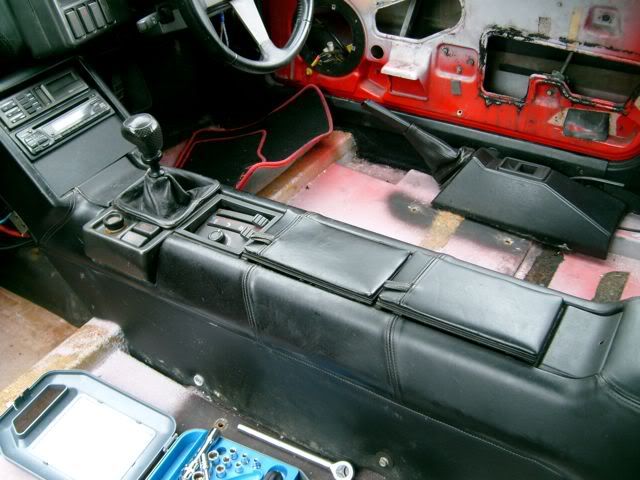
So, I have started the ball rolling and spent yesterday stripping the interior and front bumper. The side and footwell carpets are ok, but the main strips which run under the seats to the rear are shot. Seats came out after snapping just about every bolt! It was difficult to counter-hold the hex headed bolts inside the seat runners so these will be eventually going back in with socket caps!

Image

Image

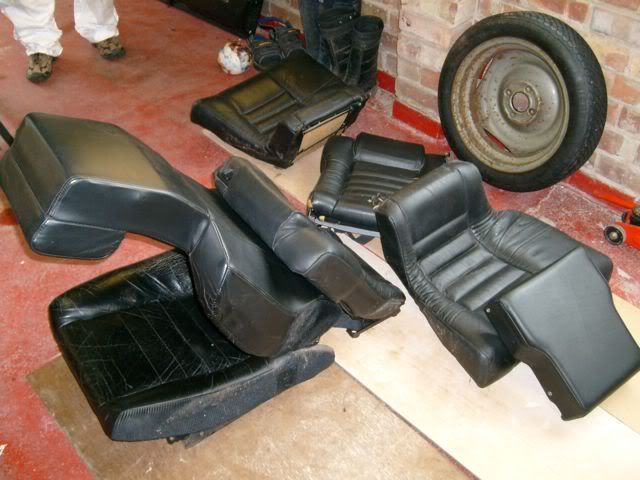
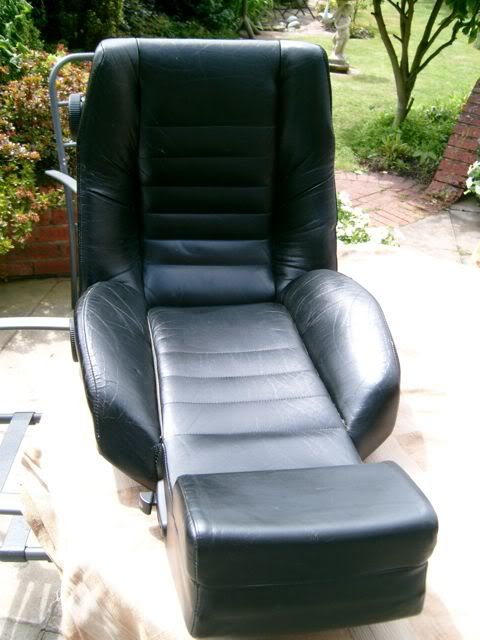
While I continued, my wife cleaned downed all of the leather with saddle soap (top tip for anyone with leather to clean - it's cheap and works a treat!) with pleasing results -
Image

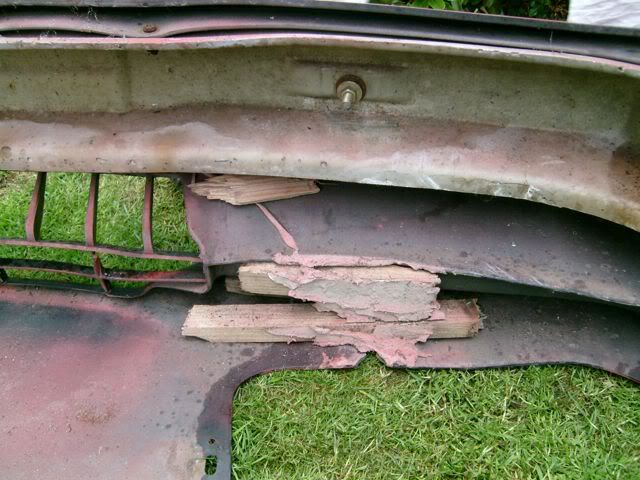
Next the front bumper was removed which gave me chance to both inspect the rubbish repair previously carried out with bits of timber -
Image

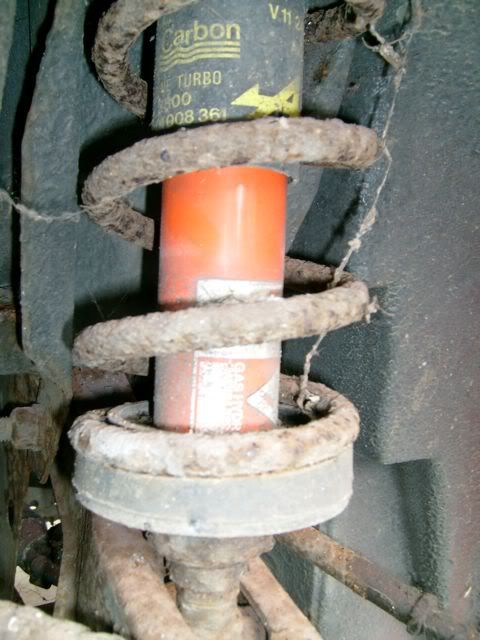
And inspect the front subframe. This looks generally ok (phew!) with surface rust but no severe corrosion or holes. The front dampers are still the adjustable Koni's which where on the car when I owned it first time around!
Image

The jacking points seem reasonable with some surface corrosion but nothing too serious as as I tell. The rear subframe however is another story! The area around top wishbone mounts next to the exhaust manifolds are totally cream crackered! This will wait however until the winter when I will have more time to concentrate on it, for now I will continue stripping the front end and treating / painting the front subframe and suspension. Not sure yet if the front bumper will repair ok or if I'm better searching for a good condition replacement.

Andy.
no avatar
User

Alpineandy

Rank

Club Member

Club Member
Posts

2381

Joined

Mon Jun 14, 2004 8:37 am

Location

North Essex


Has thanked: 5 times
Been thanked: 10 times

Re: GTA Rebuild Underway....

Postby Alpineandy » Sun Jun 26, 2011 2:36 pm

coopercobra wrote:Next the front bumper was removed which gave me chance to both inspect the rubbish repair previously carried out with bits of timber -

Image


I see what you mean there. They really should have used some wood screws at least! :lol:


Good luck.
Alpine A110, Renault Safrane 2.5dt, Hudson Kindred Spirit (Renault powered), transAlp (Honda) and Ducati Multistrada
User avatar
User

phildini

Rank

Club Member

Club Member
Posts

1736

Joined

Sun Apr 18, 2004 10:00 am

Location

Epsom Surrey/ Venezia Italy


Has thanked: 7 times
Been thanked: 0 time

Postby phildini » Sun Jun 26, 2011 2:53 pm

Full Leather everywhere.............. NICE! :D
84 R5 Le Car2 Turbo, 95 Clio 16V mk1, 68 Alfa Romeo 1750 GTV, 99 Mitsubishi Evo VI, 06 Porsche Boxster, 11 Lotus Evora S
no avatar
User

eastlmark

Rank

Non Member

Posts

2197

Joined

Sun Jul 09, 2006 3:50 pm

Location

East London


Has thanked: 55 times
Been thanked: 48 times

Re: GTA Rebuild Underway....

Postby eastlmark » Sun Jun 26, 2011 5:24 pm

Alpineandy wrote:
coopercobra wrote:Next the front bumper was removed which gave me chance to both inspect the rubbish repair previously carried out with bits of timber -

Image


I see what you mean there. They really should have used some wood screws at least! :lol:


Good luck.


I hope that is damp treated timber they used, would be a real cowboy job if not :lol:
User avatar
User

coopercobra

Rank

Non Member

Posts

88

Joined

Sat Jun 04, 2011 9:50 pm

Location

Llandegla


Has thanked: 1 time
Been thanked: 1 time

Postby coopercobra » Sun Jun 26, 2011 8:30 pm

Don't talk to me about woodscrews, the whole bumper was fixed using a nice mix of slot and cross head No 8's :roll: , as was the drivers door pull handle...

Andy
no avatar
User

Alpineandy

Rank

Club Member

Club Member
Posts

2381

Joined

Mon Jun 14, 2004 8:37 am

Location

North Essex


Has thanked: 5 times
Been thanked: 10 times

Postby Alpineandy » Mon Jun 27, 2011 10:11 am

coopercobra wrote:Don't talk to me about woodscrews, the whole bumper was fixed using a nice mix of slot and cross head No 8's :roll: , as was the drivers door pull handle...
Andy


That is odd.
I understood from Clee & Mr Taylor that the standard fixing for these items are cable -ties! :lol:
Alpine A110, Renault Safrane 2.5dt, Hudson Kindred Spirit (Renault powered), transAlp (Honda) and Ducati Multistrada
User avatar
User

clee

Rank

Non Member

Posts

10431

Joined

Fri May 28, 2004 11:58 am

Location

Derbyshire


Has thanked: 54 times
Been thanked: 104 times

Postby clee » Mon Jun 27, 2011 12:15 pm

Must be an Old Skool pikey fix innit :wink:
User avatar
User

simontaylor

Rank

Non Member

Posts

5602

Joined

Thu Apr 15, 2004 12:33 pm

Location

Fleet, Hampshire


Has thanked: 44 times
Been thanked: 56 times

Postby simontaylor » Mon Jun 27, 2011 12:50 pm

Cable ties are the way to go.
Cheaper, lighter and quicker to fix than screws.
1986 : '86 GTA v6 BW-EFR turbo, with Adaptronic ECU
Firsts at
2007 : Gurston Down & RAOC Champion
2008 : Rushmoor & Eelmoor & ACSMC Hillclimb class Champion
2009 : Longcross & Eelmoor
2010 : Crystal Palace & Eelmoor
2016 : Rushmoor & 5th O/A
User avatar
User

si21

Rank

Non Member

Posts

2094

Joined

Mon May 09, 2005 8:24 pm

Location

S.E London


Has thanked: 3 times
Been thanked: 2 times

Postby si21 » Mon Jun 27, 2011 2:32 pm

Hi arn't you the lucky one, only 2 of the four bolts snapped on my drivers seat and it took Mr Dell and myself armed with all sorts the best part of 5 hours to get the seat out!! thats why the carpet and passenger seat have not yet been removed from my car ....I dont want to create any more problems at the moment :lol: :lol: :lol: I think the rear seats are going to be the same too :roll: :lol: :lol: :lol:

si21
User avatar
User

coopercobra

Rank

Non Member

Posts

88

Joined

Sat Jun 04, 2011 9:50 pm

Location

Llandegla


Has thanked: 1 time
Been thanked: 1 time

Postby coopercobra » Sat Nov 05, 2011 7:03 pm

Started constructive work at last! :D

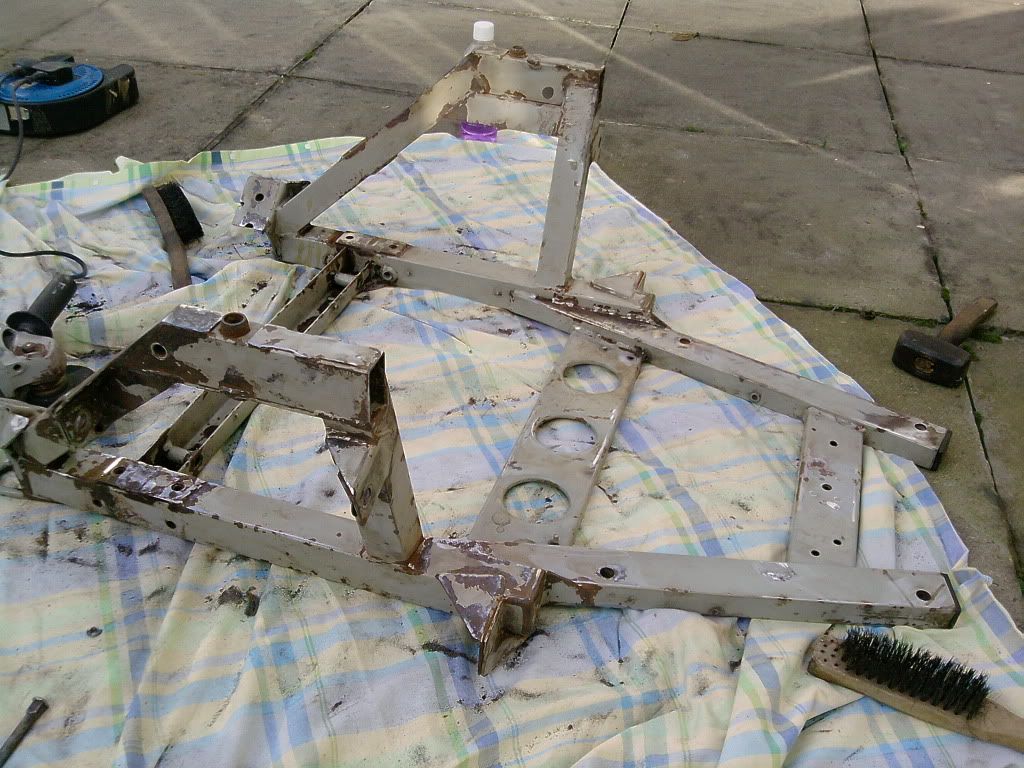
After what seems like ages spent ripping the car to bits, today was spent cleaning, rubbing down, treating and spraying the subframe we picked up from big MVS. First off, was the cleaning off of any loose & flakey areas -

Image

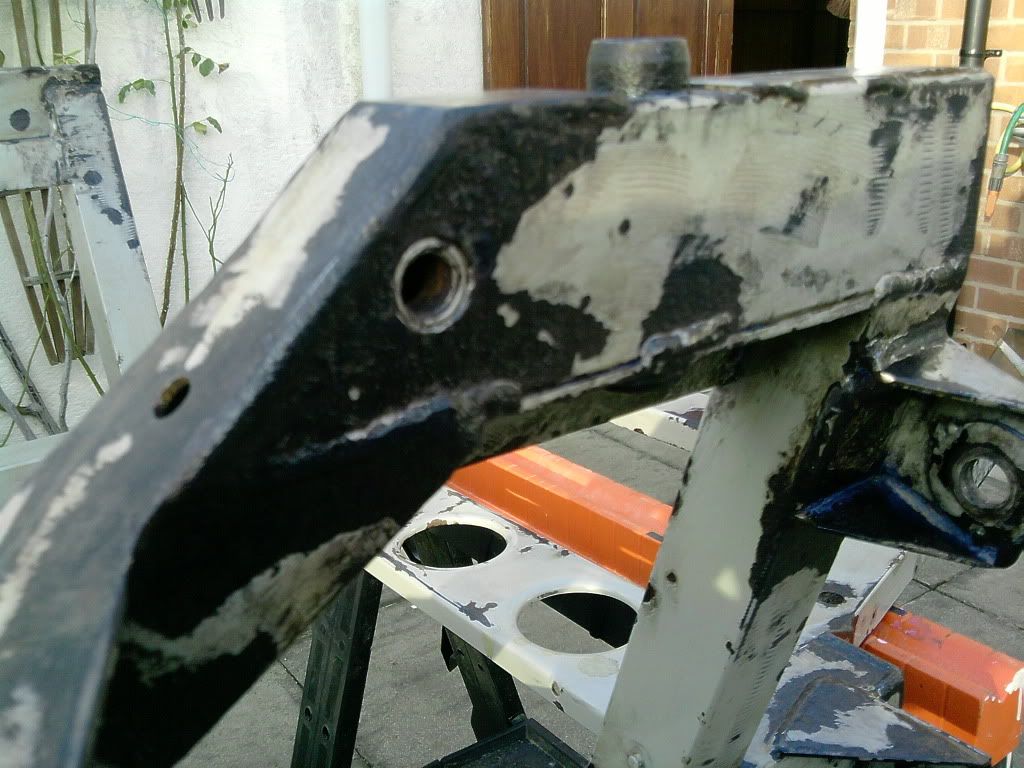
Next up was a 'rust remedy' treatment to turn any of the surface rust to a black paintable surface. The subframe was in good nick, just minor surface stuff -

Image

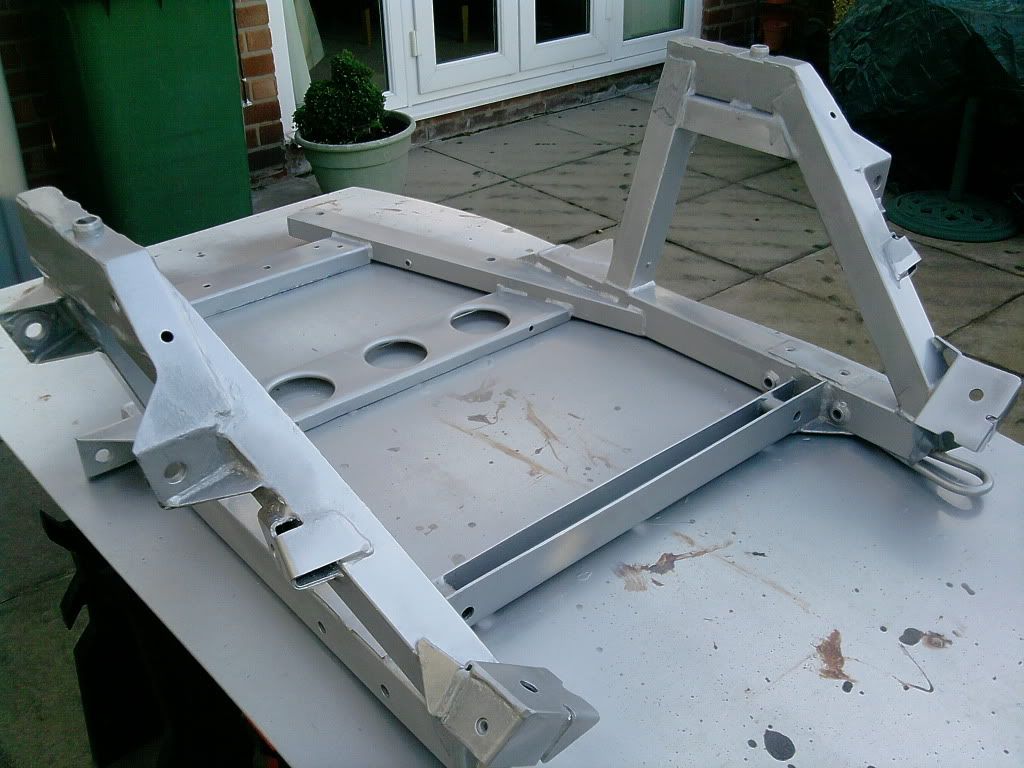
Finally managed to get a few coats of cold galv etch primer onto it before getting dark -

Image

It will be getting a satin black topcoat before we embark on the big 'swap'.

Finally feels like the car is slowly on the way to recovery! I am also going to make a new headlamp mounting plate for the near side as the old one is cream crackered, so have the near side to use as mirror image template. Hopefully have something knocked up in the coming weeks...

Andy.
User avatar
User

BIG_MVS

Rank

Club Member

Club Member
Posts

5097

Joined

Wed Jun 30, 2004 9:12 am

Location

Sandbach


Has thanked: 38 times
Been thanked: 72 times

Postby BIG_MVS » Sat Nov 05, 2011 11:37 pm

Looking good, keep up the good work 8)
1994 A610 - Montana Red (For Sale)
User avatar
User

PaulC1959

Rank

Non Member

Posts

1147

Joined

Sun Oct 15, 2006 8:56 pm

Location

Bedfordshire


Has thanked: 10 times
Been thanked: 6 times

Postby PaulC1959 » Sun Nov 06, 2011 11:32 am

BIG_MVS wrote:Looking good, keep up the good work 8)


Ditto Andy, It is looking good. Keep it going. :D

How much work is involved in removing a rear subframe for renovations?

Does the engine remain in the car or come out with the subframe?
Venturi 260 - Saphir (Bleu)
Renault Sport Megane 230 F1 Team R26 - Liquid Yellow
Renault Sport Clio 197 - Ultra Red
Renault Megane Maxim 1.5 DCi - Extreme Blue (Daily Runner)
Minari RS - Coral Red
Smart Roadster Coupe 80 - Spice Red
User avatar
User

stephendell

Rank

Club Member

Club Member
Posts

7463

Joined

Wed Apr 14, 2004 7:25 pm

Location

London


Has thanked: 125 times
Been thanked: 102 times

Postby stephendell » Sun Nov 06, 2011 2:54 pm

Usually easier to take it all out if it's the first time but Mr Gamblen managed to keep his in second time around with some carefully placed supports.
Trafic, Twingo GT, Vel Satis Turbo x 2, Clio V6 Proto Ph2, Vel Satis 3.5, Avantime, Alpine A610, GTA Atmo x 3, GTA Turbo x 3, R5 Gordini Turbo Mid Engine, Alpine A310 4cyl, Alpine A110, Yellow Smart
no avatar
User

cineman

Rank

Non Member

Posts

34

Joined

Fri Jul 23, 2010 8:18 pm

Location

Italy


Has thanked: 0 time
Been thanked: 0 time

Postby cineman » Sun Nov 06, 2011 4:27 pm

hello!
Good work you are doing for the frame restoration! ;)
I'm doing the same thing on my project GTA, i have the rear subframe completely removed, but i would like to take more care on the front frame also.
Do you know what could be a good way of work? I think the front subframe is glued to the fiberglass and it would be a pain to take it of... now im disassembling Everything in the front of the car ( bumbers, radiators, hoses, fuel tank...just everything...) for see what i can do to the front subframe when i see it clearly...
3.0lt Z7X PRV Twin turbo Delorean
RHD Red Renault Alpine GTA Turbo
User avatar
User

coopercobra

Rank

Non Member

Posts

88

Joined

Sat Jun 04, 2011 9:50 pm

Location

Llandegla


Has thanked: 1 time
Been thanked: 1 time

Postby coopercobra » Sun Nov 06, 2011 5:38 pm

Thanks for the encouragement chaps!!

Cineman - Sounds like I'm in a similar situation to you. The front end doesn't look anything like as bad as the rear, lots of surface rust but have not seen any deep rot. Like you, I believe that some of the front subframe is bonded into the body, something I don't want to disturb unless I really have to... Have a good search through some of the older posts on this forum, there is lots of useful information in here :wink:

Andy
Next


  • Advertisement

Who is online

Users browsing this forum: No registered users and 547 guests

Powered by phpBB ® | Renault' and 'Alpine' are trademarks of Renault S.A.S. or its subsidiaries and are used with kind permission of Renault France