My GTA Turbo.... (From Isle of Man)

A place to showcase your pride and joy

Moderators: eastlmark, BIG_MVS, Test Moderator

User avatar
User

The Saint

Rank

Administrator

Posts

1128

Joined

Thu Sep 08, 2011 11:55 am

Location

Rugby Warwickshire


Has thanked: 57 times
Been thanked: 45 times

Postby The Saint » Wed Oct 05, 2011 6:15 pm

It is quite easy.... just look at your old lining and see if it is worth saving... if not then look for a material that you think will work for you...
I often buy my interior material from woolies.. No not that one... this one
http://www.woolies-trim.co.uk/
Buy some thin backing foam and the lining of your choice...
They do a great mail order, and they can also supply the heat proof glue.. which is VERY important.

Now to start the work....
Remove all the trim, around the roof lining, the sun visors and light, taking great care NOT to snap the little burrs of plastic that hold the light lens in place..
Pull off the old lining and the backing sponge, that will now be more like a power!! Once you have all this removed.. and I mean ALL the loose stuff, vacuumed the car out, then I would recommend you buy the aerosol glue and spray a good layer on the roof..(Try not to get any on the seats etc) let this dry... ( Don't worry too much about the old glue, just as long as it is solid and not flaky etc... )

Now with the old lining, use this as a template and cut out a section of thin foam for a backing, and then again for the material for the lining. make sure it is a little bit larger than the original, so you can trim off later.
Spray a layer of glue on the back of the new lining material, and the face of the foam, and allow to dry.
This is when things become fun!!! I would advise someone else to help you here, as once the two parts of the glue touch, there is no going back and no movement. I would lay the foam on something clean on the floor, Glue side up, and get you and a friend to hold the lining above the foam, and slowly lower it down onto the foam, so that both glued sides meet. Once in contact, gently from the centre of the panel and rub outward pressing it down to make a good join.
Ok so far so good! Now flip it over and spray the back of the foam and let dry..
Now when you go to put this in the car, you have very little room and you cannot adjust it once it makes contact.. so I sort of folded the new panel in half so I had an edge that was going to run down the centre of the roof and used the ariel hole as that reference. I them placed the new lining up to the front and then back to the rear window working from the middle of the roof.. This is very tricky and space is limited but once the centre is up you can open out the panel and rub it out flattening it out against the roof.. once it is all open and pressed together, you can trim off any excess.. then replace all the trim, and Vola! Job done!!!!
I wish I had taken more photos but as many of you know, once you get into a job, you sort of forget to take pictures, plus you really don't want to see a picture of me doing yoga inside the car trying to fit the lining....
I hope this sort of helps.. again any questions please ask..
The Saint.
Blue A610,
Black Smart Roadster.
SmartEDElectric Drive
User avatar
User

PaulC1959

Rank

Non Member

Posts

1147

Joined

Sun Oct 15, 2006 8:56 pm

Location

Bedfordshire


Has thanked: 10 times
Been thanked: 6 times

Postby PaulC1959 » Wed Oct 05, 2011 7:57 pm

The Saint wrote:It is quite easy.... just look at your old lining and see if it is worth saving... if not then look for a material that you think will work for you...
I often buy my interior material from woolies.. No not that one... this one
http://www.woolies-trim.co.uk/
Buy some thin backing foam and the lining of your choice...
They do a great mail order, and they can also supply the heat proof glue.. which is VERY important.

Now to start the work....
Remove all the trim, around the roof lining, the sun visors and light, taking great care NOT to snap the little burrs of plastic that hold the light lens in place..
Pull off the old lining and the backing sponge, that will now be more like a power!! Once you have all this removed.. and I mean ALL the loose stuff, vacuumed the car out, then I would recommend you buy the aerosol glue and spray a good layer on the roof..(Try not to get any on the seats etc) let this dry... ( Don't worry too much about the old glue, just as long as it is solid and not flaky etc... )

Now with the old lining, use this as a template and cut out a section of thin foam for a backing, and then again for the material for the lining. make sure it is a little bit larger than the original, so you can trim off later.
Spray a layer of glue on the back of the new lining material, and the face of the foam, and allow to dry.
This is when things become fun!!! I would advise someone else to help you here, as once the two parts of the glue touch, there is no going back and no movement. I would lay the foam on something clean on the floor, Glue side up, and get you and a friend to hold the lining above the foam, and slowly lower it down onto the foam, so that both glued sides meet. Once in contact, gently from the centre of the panel and rub outward pressing it down to make a good join.
Ok so far so good! Now flip it over and spray the back of the foam and let dry..
Now when you go to put this in the car, you have very little room and you cannot adjust it once it makes contact.. so I sort of folded the new panel in half so I had an edge that was going to run down the centre of the roof and used the ariel hole as that reference. I them placed the new lining up to the front and then back to the rear window working from the middle of the roof.. This is very tricky and space is limited but once the centre is up you can open out the panel and rub it out flattening it out against the roof.. once it is all open and pressed together, you can trim off any excess.. then replace all the trim, and Vola! Job done!!!!
I wish I had taken more photos but as many of you know, once you get into a job, you sort of forget to take pictures, plus you really don't want to see a picture of me doing yoga inside the car trying to fit the lining....
I hope this sort of helps.. again any questions please ask..


Brilliant, Thanks Fella :D :D :D
Venturi 260 - Saphir (Bleu)
Renault Sport Megane 230 F1 Team R26 - Liquid Yellow
Renault Sport Clio 197 - Ultra Red
Renault Megane Maxim 1.5 DCi - Extreme Blue (Daily Runner)
Minari RS - Coral Red
Smart Roadster Coupe 80 - Spice Red
User avatar
User

The Saint

Rank

Administrator

Posts

1128

Joined

Thu Sep 08, 2011 11:55 am

Location

Rugby Warwickshire


Has thanked: 57 times
Been thanked: 45 times

MVS Wheels on my GTA

Postby The Saint » Sun Oct 30, 2011 5:06 pm

These pics are just for Martin, as we did a deal on these today, and just wanted to show them on the car for him..

Before...
http://i1191.photobucket.com/albums/z46 ... 0636-1.jpg

After...
http://i1191.photobucket.com/albums/z46 ... G_0457.jpg

http://i1191.photobucket.com/albums/z46 ... G_0462.jpg

http://i1191.photobucket.com/albums/z46 ... G_0463.jpg

And for those keen spotters out there... The drivers seat is stripped while I make a template from the old cover, and make a new one...

http://i1191.photobucket.com/albums/z46 ... G_0450.jpg

Will let you see the end result once done.

Thanks again Martin.... :D
The Saint.
Blue A610,
Black Smart Roadster.
SmartEDElectric Drive
User avatar
User

PaulC1959

Rank

Non Member

Posts

1147

Joined

Sun Oct 15, 2006 8:56 pm

Location

Bedfordshire


Has thanked: 10 times
Been thanked: 6 times

Postby PaulC1959 » Sun Oct 30, 2011 5:32 pm

Hi Saint

They look nice, I'm sure you are happy with them. :D :D
Venturi 260 - Saphir (Bleu)
Renault Sport Megane 230 F1 Team R26 - Liquid Yellow
Renault Sport Clio 197 - Ultra Red
Renault Megane Maxim 1.5 DCi - Extreme Blue (Daily Runner)
Minari RS - Coral Red
Smart Roadster Coupe 80 - Spice Red
User avatar
User

The Saint

Rank

Administrator

Posts

1128

Joined

Thu Sep 08, 2011 11:55 am

Location

Rugby Warwickshire


Has thanked: 57 times
Been thanked: 45 times

Postby The Saint » Sun Oct 30, 2011 5:36 pm

The car is coming along.... Once I sort a few more little bits and the engine oil leak, I think it will be body work and respray time,,, It looks ok in the photos but there are some nasty bits that need sorting..

Fingers crossed, I may have it on the road by Spring???
The Saint.
Blue A610,
Black Smart Roadster.
SmartEDElectric Drive
User avatar
User

BIG_MVS

Rank

Club Member

Club Member
Posts

5097

Joined

Wed Jun 30, 2004 9:12 am

Location

Sandbach


Has thanked: 38 times
Been thanked: 72 times

Postby BIG_MVS » Sun Oct 30, 2011 5:48 pm

My pleasure Vince, the car does look well with them on.

Looking forward to some more updates on progress :wink:
1994 A610 - Montana Red (For Sale)
User avatar
User

mettersl

Rank

Club Member

Club Member
Posts

2028

Joined

Sat Nov 13, 2004 12:46 pm

Location

Saffron Walden- North Essex


Has thanked: 23 times
Been thanked: 59 times

Postby mettersl » Sun Oct 30, 2011 8:44 pm

And is that your Smart Roadster in the background...?
I have one, as does (did?) Martin (Stunned Monkey)..a lot of similarities- French, inherent problems, didn't sell that well, engine in an odd place, great fun....
User avatar
User

PaulyA610

Rank

Non Member

Posts

902

Joined

Sat Nov 14, 2009 9:30 pm

Location

Gloucester


Has thanked: 1 time
Been thanked: 3 times

Postby PaulyA610 » Sun Oct 30, 2011 9:31 pm

I am enjoying reading this resoration thread it is very good, with good pic's!! The wooleys link has been very handy too, keep up the good work and keep us updated.
Lotus Evora 400
Renault R8
Renault Megane R.S 265 Trophy
Renault megane sport tourer


GAZ Suspension Dealer,SPAX Dealer, Forge Motorsport Dealer,Alpine ICE Dealer,
no avatar
User

andy001

Rank

Non Member

Posts

972

Joined

Sat Jul 18, 2009 6:09 pm


Has thanked: 1 time
Been thanked: 3 times

Postby andy001 » Sun Oct 30, 2011 10:11 pm

those wheels do look good, keep it up :D
User avatar
User

coopercobra

Rank

Non Member

Posts

88

Joined

Sat Jun 04, 2011 9:50 pm

Location

Llandegla


Has thanked: 1 time
Been thanked: 1 time

Re: MVS Wheels on my GTA

Postby coopercobra » Mon Oct 31, 2011 7:05 pm

The Saint wrote:These pics are just for Martin, as we did a deal on these today, and just wanted to show them on the car for him..

Before...
http://i1191.photobucket.com/albums/z46 ... 0636-1.jpg

After...
http://i1191.photobucket.com/albums/z46 ... G_0457.jpg

http://i1191.photobucket.com/albums/z46 ... G_0462.jpg

http://i1191.photobucket.com/albums/z46 ... G_0463.jpg

And for those keen spotters out there... The drivers seat is stripped while I make a template from the old cover, and make a new one...

http://i1191.photobucket.com/albums/z46 ... G_0450.jpg

Will let you see the end result once done.

Thanks again Martin.... :D


Those wheels really suit the black GTA - looks the mutts! Reckon you'll have a very tasty example after this work.

Andy.
User avatar
User

The Saint

Rank

Administrator

Posts

1128

Joined

Thu Sep 08, 2011 11:55 am

Location

Rugby Warwickshire


Has thanked: 57 times
Been thanked: 45 times

Postby The Saint » Mon Oct 31, 2011 7:33 pm

Thank you all for the encouragement. I have loads more pics of things I have already done, but don't want to spam the site with lots of things you may have already seen... As in the Kenwood DNX 7200 SatNav Double Din I fitted with Handsfree and iPod etc etc.. Still working on the centre console, as I hate the offset switch pod for the window switches... so moving them.


Yes the Smart Roadster is a sort of shrunken GTA.. Had lots of fun with it too Did a tour of France in 2010. Drove all the way to Spain and then back over the Millau Bridge.. over 2500 mile in a car of only 698 cc, and that was amazing.. very comfortable too!! But this is not the site for Smarts..

Image

I hope I have the Alpine sorted for Summer 2012... As I want to take it over the bridge again.. Just love the roads in France... Maybe we could get some kind of trip for the RAOC??
25 Smart Roadster driving across France was a real head turner for the French, so imagine a parade of Alpines????
Worth a think about???
The Saint.
Blue A610,
Black Smart Roadster.
SmartEDElectric Drive
User avatar
User

mettersl

Rank

Club Member

Club Member
Posts

2028

Joined

Sat Nov 13, 2004 12:46 pm

Location

Saffron Walden- North Essex


Has thanked: 23 times
Been thanked: 59 times

Postby mettersl » Mon Oct 31, 2011 8:30 pm

Sounds like a great plan, but have you heard about the Macon trip? Not just a road trip, but some great navigation exercises, food and company....
Cheers
Lee
User avatar
User

The Saint

Rank

Administrator

Posts

1128

Joined

Thu Sep 08, 2011 11:55 am

Location

Rugby Warwickshire


Has thanked: 57 times
Been thanked: 45 times

Postby The Saint » Mon Oct 31, 2011 8:34 pm

Nope news to me.. I only scan the threads, looking for specific things, so may have missed that one. :(
The Saint.
Blue A610,
Black Smart Roadster.
SmartEDElectric Drive
no avatar
User

andy001

Rank

Non Member

Posts

972

Joined

Sat Jul 18, 2009 6:09 pm


Has thanked: 1 time
Been thanked: 3 times

Postby andy001 » Mon Oct 31, 2011 10:31 pm

no... no....no.if you want to tour france this is the trip. hundreds of alpines all converging on one town. ive not been on this one yet but i hope to soon.
check out the macon threads in events and meetings
User avatar
User

The Saint

Rank

Administrator

Posts

1128

Joined

Thu Sep 08, 2011 11:55 am

Location

Rugby Warwickshire


Has thanked: 57 times
Been thanked: 45 times

Interior update

Postby The Saint » Sun Nov 27, 2011 4:27 pm

Hi Folks....
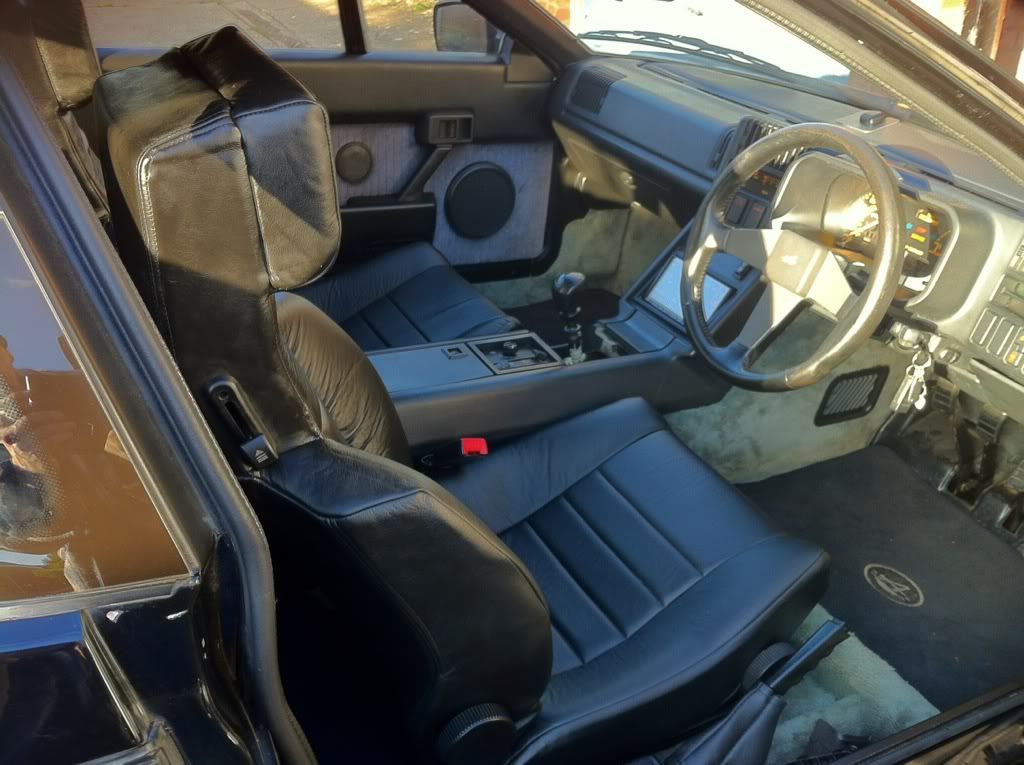
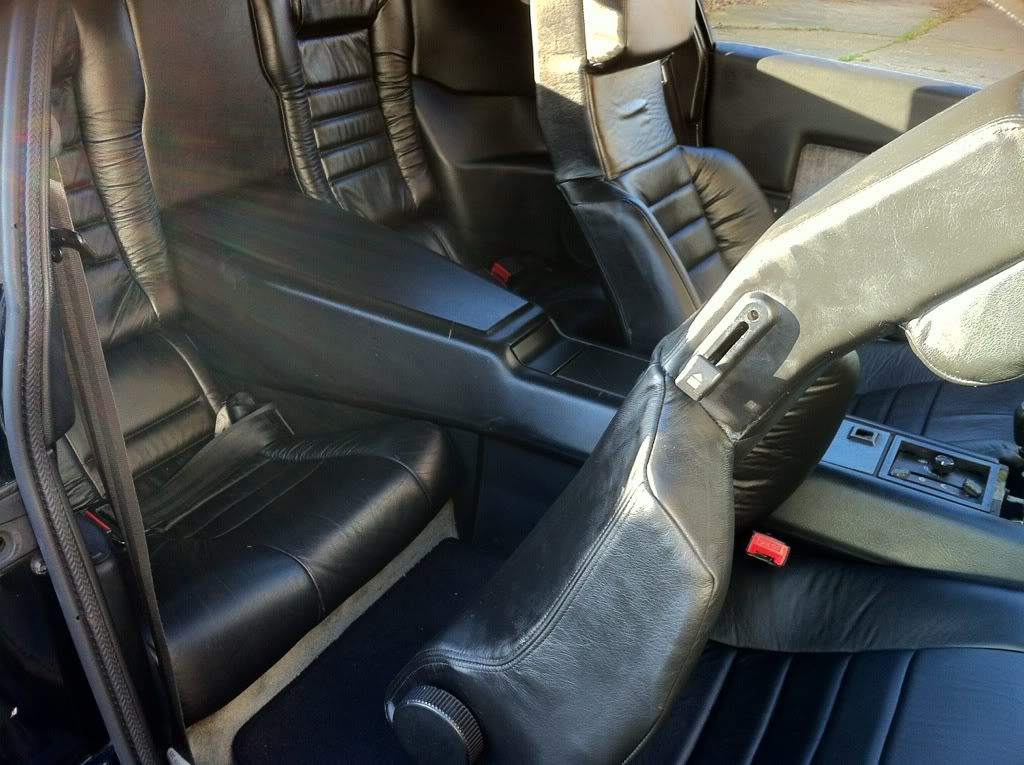
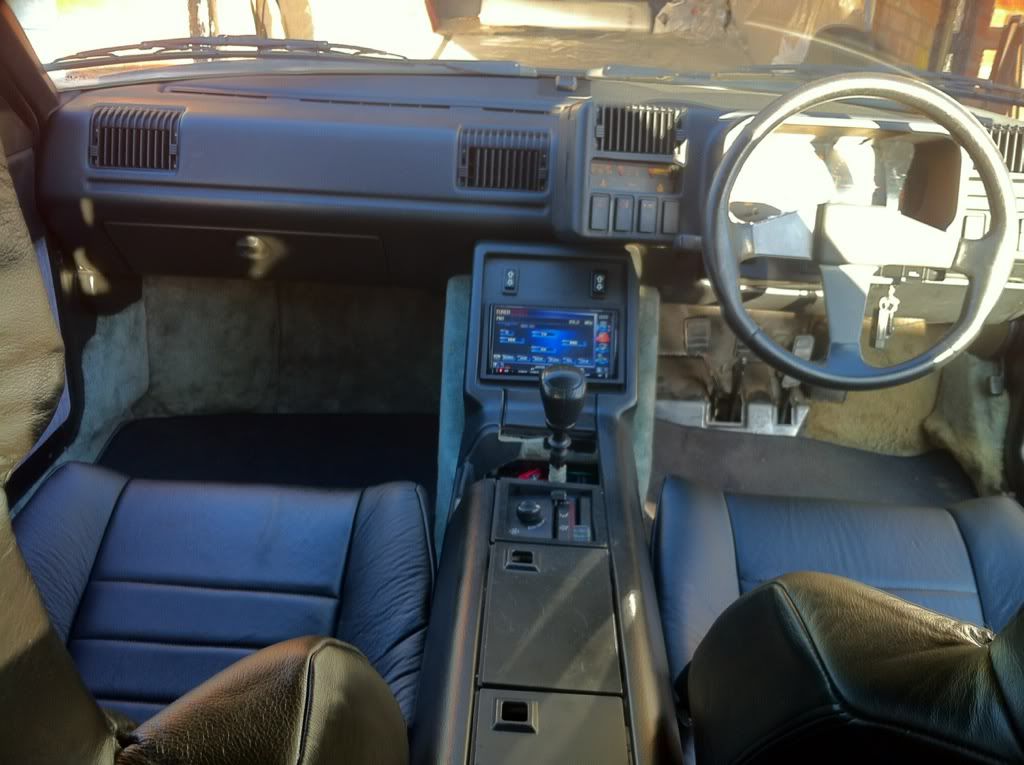
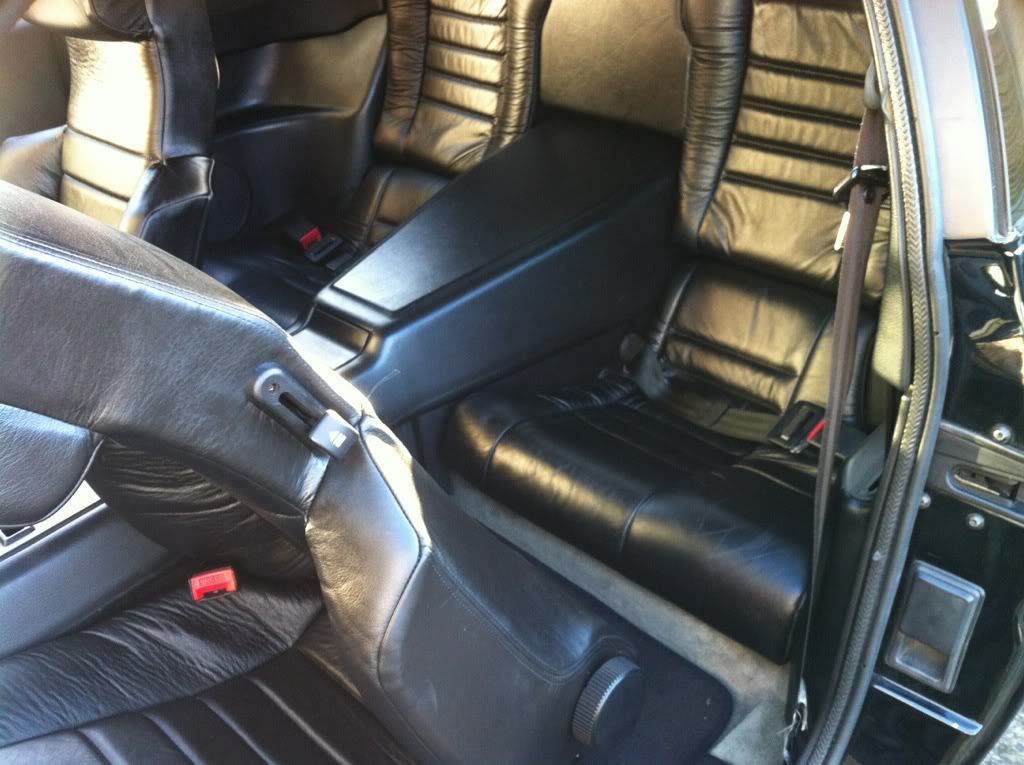
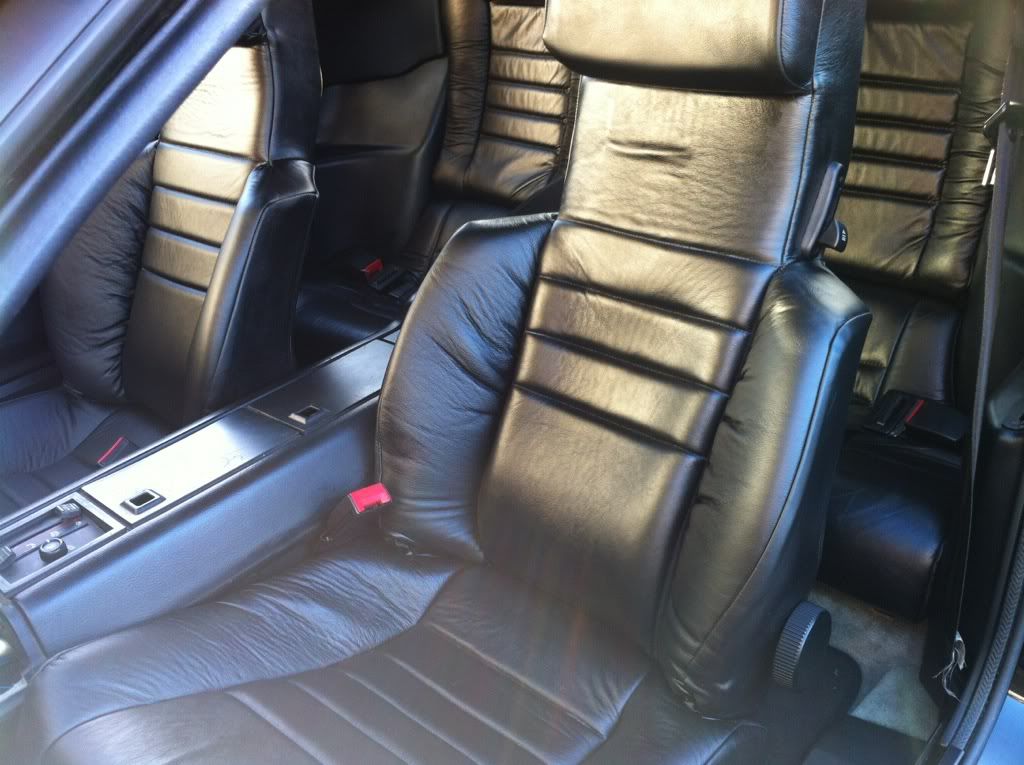
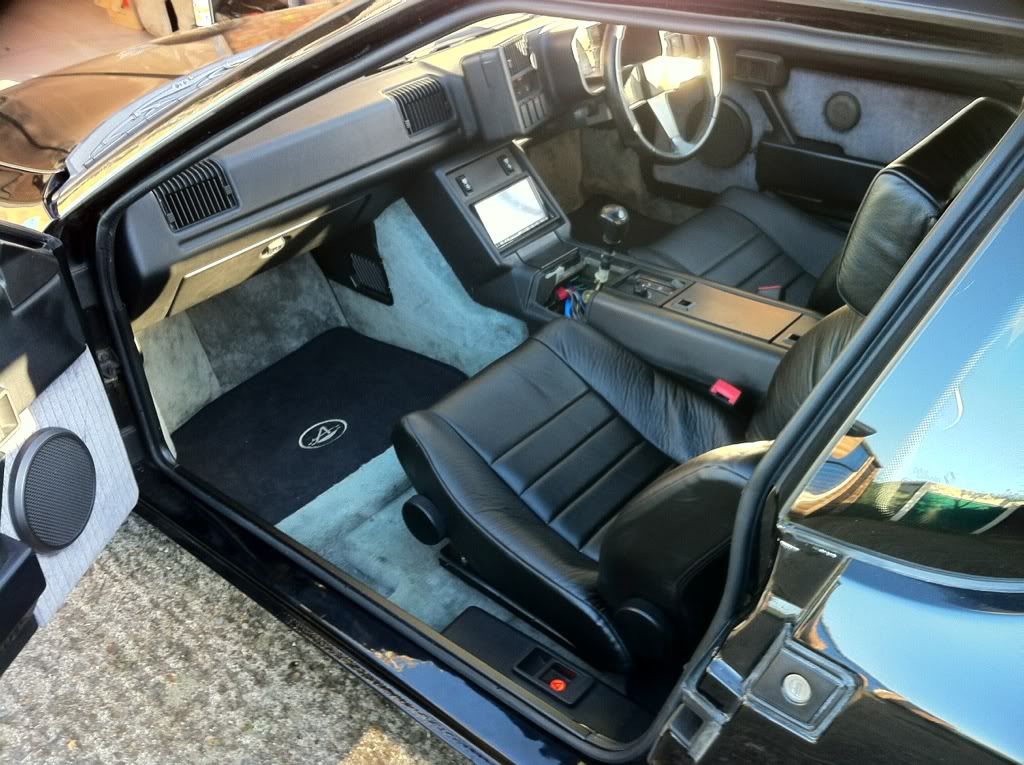
It has been a few weeks since I last posed anything, but here is my interior since I re upholstered it.

Ignore the centre console, that is still a "work in process".

I have moved the window switched from the hateful pod thing / after thought, that they made, and mounted them about the radio / Satnav system. I will fill in the gap around the Gear shift and return the symmetry later.

I am happy with things so far.... Will update when I have more to show..
Enjoy!!

Image

Image

Image

Image

Image

Image

Image
The Saint.
Blue A610,
Black Smart Roadster.
SmartEDElectric Drive
PreviousNext


  • Advertisement

Who is online

Users browsing this forum: No registered users and 419 guests

Powered by phpBB ® | Renault' and 'Alpine' are trademarks of Renault S.A.S. or its subsidiaries and are used with kind permission of Renault France